Overview of Heat Sink Design Basics and Principles
It’s important for electrical engineers to remember the basics and how they affect our designs. When it comes to thermal management, thermal resistance, and heat sinks, the three main phenomena that drive heat transfer are convection, conduction, and radiation. Heat design strategies for modern PCBs rely on a combination of all three effects, and you should consider a holistic approach to heat management in your PCB.
These three fundamental phenomena can be influenced by things like fin placement and orientation, selection of thermal interface materials (TIM), and heat sink surface treatment. If you're a systems designer and you need a comprehensive heat management strategy, you should know some heat sink design basics, as well as how to select a heat sink and other cooling strategies for your PCB.
Heat Sink Design Basics for Your PCB
Heat sink design basics are all about selecting the right geometry for a heat sink to affix to high power components, which then needs to be paired with other cooling strategies. There are many off-the-shelf options for heat sinks, all with slightly different form factors, masses, and materials. Manufacturers will also supply or recommend heat sinks for their components (e.g., GPU and CPU manufacturers). You could select one of these options to cool your high power components, or you could design a CAD model for a custom heat sink. If you're going the latter route, you should use the manufacturer's heat sink recommendations as a starting point for heat sink design.
First, it's important to understand that not all components will need a heat sink attached directly to the component. In some cases, the heat sinks are much larger than the components they intend to cool, and not all components generate enough heat to warrant use of a heat sink. Some IC packages (e.g., QFN) have a die-attached heat sink that is meant to dissipate heat directly into the substrate.
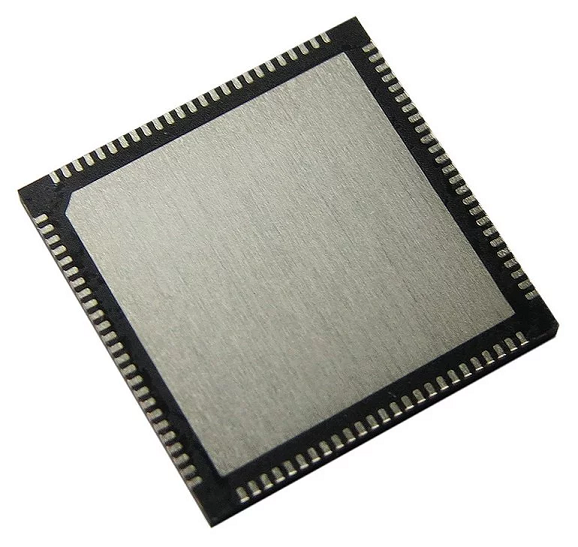
If you do need to select an off-the-shelf heat sink or design your own heat sink, you should consider how to take advantage of the three fundamental mechanisms that drive heat transfer.
Convection
Natural and forced convection can drive airflow through a heat sink. Natural convection does not use any fans or outside force to move air. Instead, it relies on the convection currents that naturally occur in a differentially heated fluid. This passive process draws no power, but can also be a bit slow in cooling things down. The flow is quite weak in a natural convection scheme, so if it’s obstructed in any way your cooling will be severely inhibited. When placing the heat sink, you should be sure to orient it so that air can rise parallel through the fins, and place some inlet/outlet for air to naturally flow through your enclosure. The fins should be in a sparse placement pattern; if the fins are densely grouped they will inhibit convection.
Forced convection is just the opposite, it uses an outside force to move air. Usually, this force would be something like an electronic cooling fan. With this method, you have to power the cooling fan, but you get faster cooling in exchange. Interestingly enough, the form you choose will determine the heat sink you should choose for your PCB in order to maximize heat dissipation. To get the most out of forced convective heat transfer, follow these recommendations when designing a heat sink or selecting an off-the-shelf heat sink:
- Turbulent flow: When flow is constricted through a narrow opening, it will sit in the laminar regime, and heat flow from the heat sink into surrounding air will be limited due to lack of mixing. You want fluid flow to transition to the turbulent regime as natural mixing will aid heat transfer from the heat sink. Make sure your heat sink has enough space between fins so that airflow transitions out of the turbulent regime.
- Pay attention to flow direction: It might sound basic, but you want to draw air through the heat sink and away from the rest of the board, rather than across nearby components. This is one reason heat sinks may be mounted on top of a component and directed to an outlet through a small heat pipe.
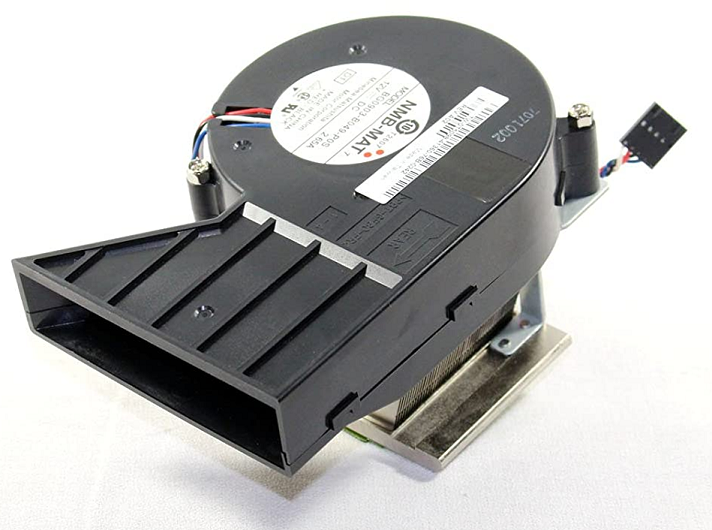
When dealing with forced convection things are at once more simple and complex. Airflow is guaranteed, it’s just a question of optimizing it. Like before, you’ll want to orient your heat sink so that air passes parallel to the fins. Designing the fins is where things get a little tricky. The main concerns with forced convection are pressure drop and loss. If your fins are too tall or too dense, they’ll cause an excessive pressure drop across the heat sink, resulting in a bad system. If you want to find the perfect fin size and placement, you’ll need to crunch some numbers.
Conduction
Conduction drives heat between hot and cold regions in a system due to direct physical contact. This is probably the simplest method for removing heat from a hot component. When dealing with conduction you’ll need to think about where heat is being transferred. The fins on a heat sink are responsible for moving heat away from a component and into contact with air. The optimal heat sink location is on a hot spot, such as a powerful integrated circuit (IC) or a thermal spreader that collects heat from several sources.
The rate at which heat is removed depends on the thermal diffusivity of the heat sink material, which depends on the thermal conductivity of the material. Among common metals, silver, gold, copper, and aluminum have the highest thermal diffusivities, in that order. Alloys are often used as they can have lower density than pure materials, which increases thermal diffusivity.
To increase heat transfer in heat sink design, you need a connection between the component and the heat sink that has high thermal conductivity. This is where a thermal paste or other thermal interface material provides adhesion with high thermal conductivity. There is a wide variety to choose from, and you should do your research to see which one is right for you.
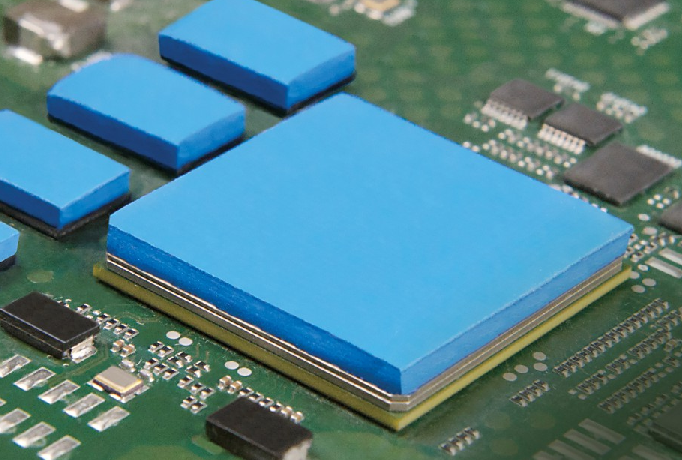
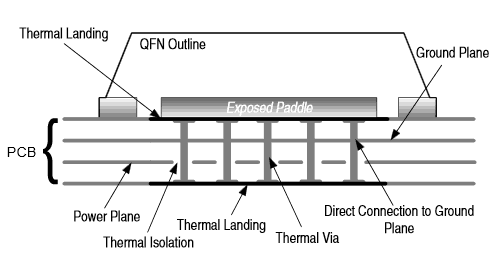
Placing your heat sink is also important. You want to maximize cooling and minimize space usage at the same time, so you’d probably be most happy if you didn’t have to use a heat sink at all. An alternative to a bulky heat sink on some ICs is to use a component with a die-attached pad. This pad can be connected to vias through the substrate which are connected to a ground plane. This spreads heat throughout the board and helps produce a more even junction temperature in the PCB. You can still use a heat sink to transfer heat into air if needed.
Radiation
Radiation simply refers to conversion of heat to radiation, which occurs simply because an object has temperature. As the object emits heat, its temperature decreases. Selecting the right material and surface finish for your heat sink will give it that extra bit of heat transfer needed to reduce temperature. In addition, the shape and mass of the material will determine how much heat can be radiated away from your heat sink.
Simply painting the heat sink black is not the whole story. Here, we're worried about the emissivity at specific wavelengths, rather than simply looking at the color of a heat sink. To be more specific, the emissivity at deep infrared wavelengths needs to be maximized. Anodized aluminum is one material that is often used in heat sinks as it has high emissivity as well as high thermal conductivity. Aluminum can also be very cheaply extruded and anodized.
In addition, a heat sink with a larger surface area to volume ratio will dissipate more heat via radiation. The more surface area you have, the more your heat sink will radiate. However, increasing the surface area will sometimes reduce convection, so you’ll need to carefully balance convection, conduction, and radiation in heat sink design.
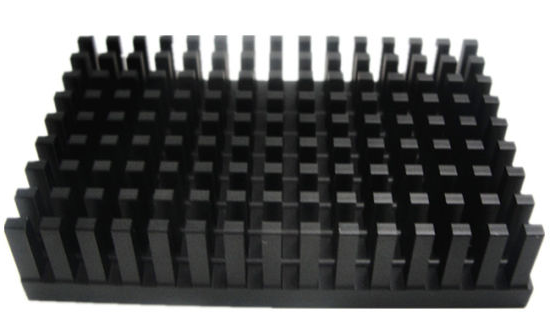
Use MCAD Tools in Your Design Software to Place Your Heat Sink
When you want to bring a heat sink into your board and examine how it fits within a larger system, you can use MCAD tools in your PCB design software to place your heat sink on your components. Just export your heat sink design from a mechanical CAD tool as a STEP file and import it into your PCB design software to get a 3D view of your heat sink in your PCB. This lets you check for collisions and fit to your enclosure.
When you're designing your own heat sink or searching for an off-the-shelf heat sink, pay attention to these other design guidelines, especially if you plan to combine your heat sink with a cooling fan.
- Cooling Fan Electrical Noise Reduction in Your PCB
- A Comparison of Active Cooling Techniques for Electronic Equipment
- EMI from Heatsinks and What You Can Do About It
Once you've followed these heat sink design basics, you can use the PCB layout tools and native MCAD features in Altium Designer to create your circuit board and place your heat sink design in 3D. The industry-standard design features in Altium Designer give you everything needed to place your heat sink design and verify mechanical clearances. Altium Designer on Altium 365 delivers an unprecedented amount of integration to the electronics industry until now relegated to the world of software development, allowing designers to work from home and reach unprecedented levels of efficiency.
We have only scratched the surface of what’s possible with Altium Designer on Altium 365. Start your free trial of Altium Designer + Altium 365 today.
